The German Rig
Keeping it simple and having an easy to tie on the bank rig is essential. With so many rigs available and getting more complicated each year. It’s important to keep it simple in my opinion, use a rig the easy to tie and most important is it’s effective. Once tied simply gently pull across your hand you will find how effective it is in turning each time. Mega important to get a good hook hold in the bottom lip.
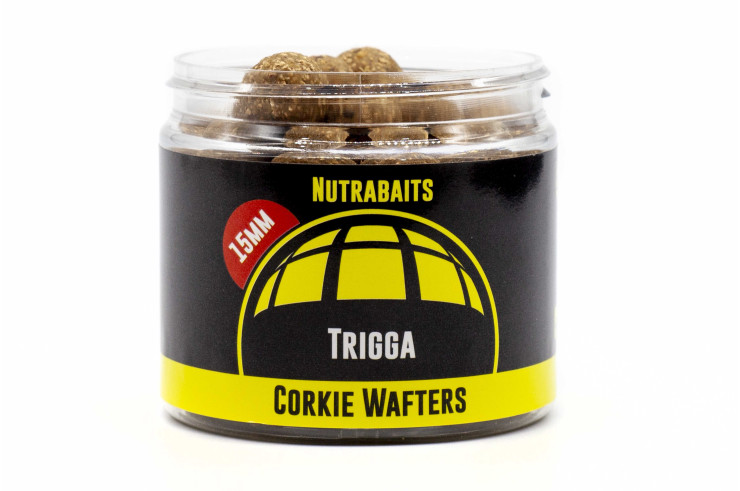
I use this rig when using Wafters over a baited spot and found it to be one of the most successful rigs when targeting carp over baited spots.
So what components do I use in the make up of this rig ?
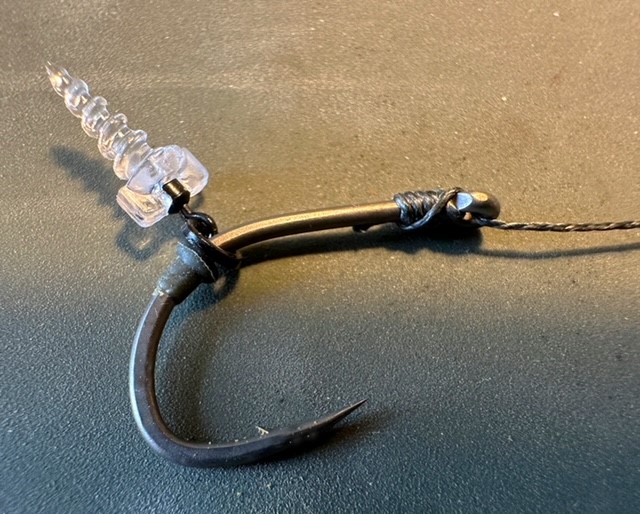
I’ve found tungsten coated braid works well, striped back within 10mm of the kicker to allow the hook to turn. There are many coated braids currently on the market but it’s the Thinking Anglers, Camskin in 25lb I’ve found best suits my angling.
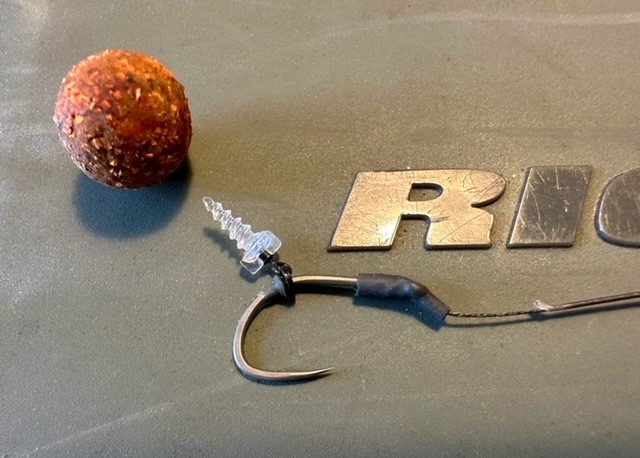
Hooks, again personal choice but using ultra sharp hooks give a big advantage with this type of set up. I don’t believe in using the sharpened varieties now on the market. In my opinion hooks straight out of the packet should be sharp enough. I use both Gardner Mugga’s and ESP Cryogen hooks and both work well. I use mostly size 4 hooks in the majority of my angling which suits both 15mm and 18mm Corkie Wafters.
Tungsten kicker, I currently use the Nash kickers but several other companies are now manufacturing similar.
Bait screws, again there are so many now available but I personally prefer the plastic variety over metal bait screws. Simply down to weight, the weight difference is little but I’m wanting as much movement with the Wafter as possible so every gram counts.
Hook stop, most companies have one in their range. I currently use the Gardner Covert ones. Again because they are the smallest and lightweight I’ve found.
Hopefully I’ve covered all the components. With the simplicity of this rig it’s possible to tie these in under a couple of minutes on the bank. Saving the need to have a rig box of made up rigs.
Making up the rig couldn’t be easier. Length of rig is personal choice and also distance you are fishing. Shorter giving better anti tangle. Also consider what type of bottom you are fishing over. If it’s weedy or silty a longer rig would be more beneficial. I tend to use a finished rig of 8” to 10”.
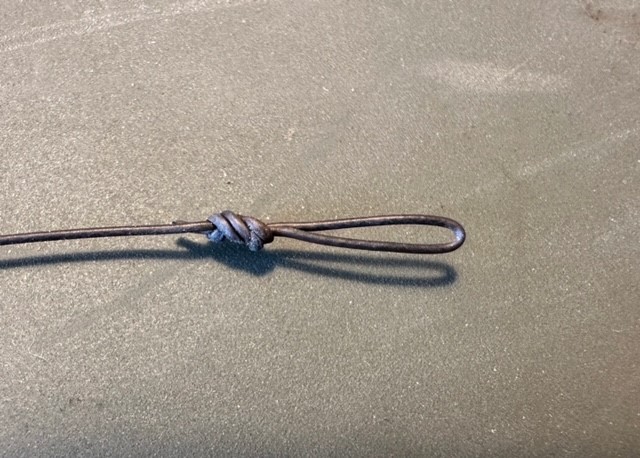
Once length of rig has been determined simply strip back 100mm of the coated braid then proceed to tie a 5 turn knot less knot. Cut off the surplus back to 3mm from the knot. This should leave approximately 15mm stripped braid.
Now slide the kicker into position, followed by bait screw and then the hook stop. The hook stop position is down to the type of hook you use. For example on a Mugga hook I position the hook stop across from the bard. On the more straight shafted ESP hook I position at the start of the bend. At this point simply screw a bait on and pull across your hand whilst trying different hook stop positions till you find the most effective for the hook you intend to use.
I use the quick change swivels in all my fishing so a simple loop knot in the braid followed by an anti-tangle tungsten kicker. The reason I use the quick change swivels is I prefer to change rigs if the hook point gets turned over instead of sharpening.
Keep it simple and hopefully we will see your catch reports over the coming months.